Setting up the AWS CLI using AWS IAM Identity Center
November 5, 2025

Setting up IAM Identity Center
- Intro
- Setting up IAM Identity Center
- Create a group
- Create a permission set for the group
- Create a user
- Assign access to your user
- Verifying our access
Setting up the AWS CLI
- Configure the AWS CLI for SSO
- Log in to your SSO profile
- Using your SSO profile
- Setting a default profile for a terminal session
Setting up IAM Identity Center
Intro
There are 3 primary ways of accessing AWS cloud services:
- Management Console (browser)
- API (programmatically)
- AWS CLI (command line/terminal)
This guide covers configuration of the AWS CLI, specifically using IAM Identity Center to handle single sign-on (SSO). While the most cumbersome method to configure the AWS CLI, this method does not require you to store any credentials or secrets on-device and follows security best practices.
From a security perspective this is more secure than the alternative, which involves configuring a profile using credentials (access keys) stored in plain text on-device. Should that device be compromised, access to these credentials would allow another identity to authenticate and access your AWS services with your same level of permissions while assuming your identity. Using Identity Center enables you to authenticate on AWS with multi-factor authentication (if configured) for an additional layer of security.
This guide assumes that you already have the AWS CLI installed on your machine. Steps to the installation guide can be found here: Installing the latest version of the AWS CLI.
Setting up IAM Identity Center
From the Management Console, navigate to IAM Identity Center. If you have not previously set up Identity Center, you should see this page:
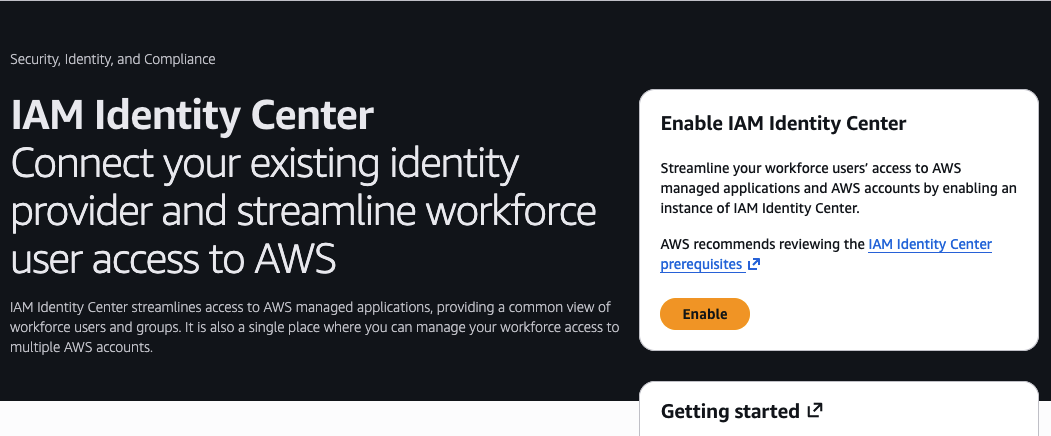
- Click Enable
Note: If your account is not part of an AWS Organization, enabling Identity Center will create an AWS Organization on your behalf and make this account the management account. It is best practice to keep the management account free of any resources. If you already have resources in your account, consider creating a new account to use as the management account when you configure Identity Center. Then invite your existing account containing resources into the organization.
Creating an account instances are for specialized use cases and do not allow you to upgrade to an organization instance later on if, for instance, you want to use one IAM Identity Center instance to access multiple AWS accounts. I will be using an organization instance of IAM Identity Center.
- The following screen will ask you to confirm the account ID and region. If you need to change the region IAM Identity Center is created in, change you region by selecting from the dropdown at the top of the Management Console UI.
- Click Enable
- After a few moments, you will be taken to the Identity Center Dashboard. From here we will confirm our identity source, where you administer users and groups and authenticate users trying to access your AWS account. (Image 2) Click Confirm identity source
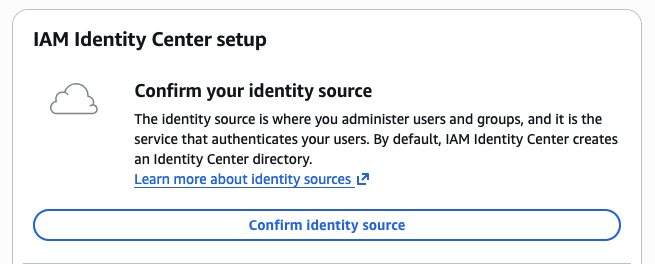
- By default, Identity Center is set as your identity provider. If you want to change your identity source, select Actions > Change Identity Source
Create a group
Before we create any users for our Identity Center instance, we will create a group which we will then add users to. This method makes creating and managing permissions much more manageable as the number of users in an Identity Center instance grows. Instead of creating, assigning, and managing permissions for each user we create, we can create role-based groups with appropriate permissions, then assign users to those groups. This guide will cover creating an admin group as an example, but consider creating other groups (i.e. developer) with permissions that are more limited in scope.
- Within the IAM Identity Center Dashboard, select Groups from the left side panel within the Identity Center console
- Click Create Group
- Group name:
admin - Description:
Administrator access to accounts within the organization - Click Create group
Create a permission set for the group
Select permission set type
- From the left side panel, select Permission Sets
- Click Create permission set
- From Permission set type, select Predefined permission set
- Under Policy for predefined permission set, select AdministratorAccess
- Click Next
Specify permission set details
- Within the Permission set details box, select:
- Permission set name:
AdministratorAccess - Description:
Administrator permission set - Session duration:
1 hour
- Permission set name:
- Click Next
- Click Create
Create a user
- From the side panel, select Users
- Click Add user
Note: The AWS account I am using for this tutorial is for my own personal sandboxing. I am not making any claims of best practices for naming conventions here, only what makes sense for me.
- In the Primary information section fill out:
- Username:
admin-[firstName] - Password:
Send an email to this suer with password setup instructions - Email address:
[yourEmail]+admin@example.com(i.e. johndoe+admin@gmail.com) - Confirm email address
- First name:
[first name] - Last name:
[last name] - Display name:
[firstName lastName]
- Username:
- Click Next
- Add user to groups: Select admin group created earlier
- Click Next
- Click Add user
You will receive an email invitation at the address you provided to complete setting up the Identity Center user. Clicking the link will take you to the sign-in portal to set a new password for your user. Once you set your new password, you will be prompted to set up an MFA device. I will be using Google Authenticator App for this guide.
- Select Authenticator app
- Follow the on-screen instructions for setting up your authenticator app
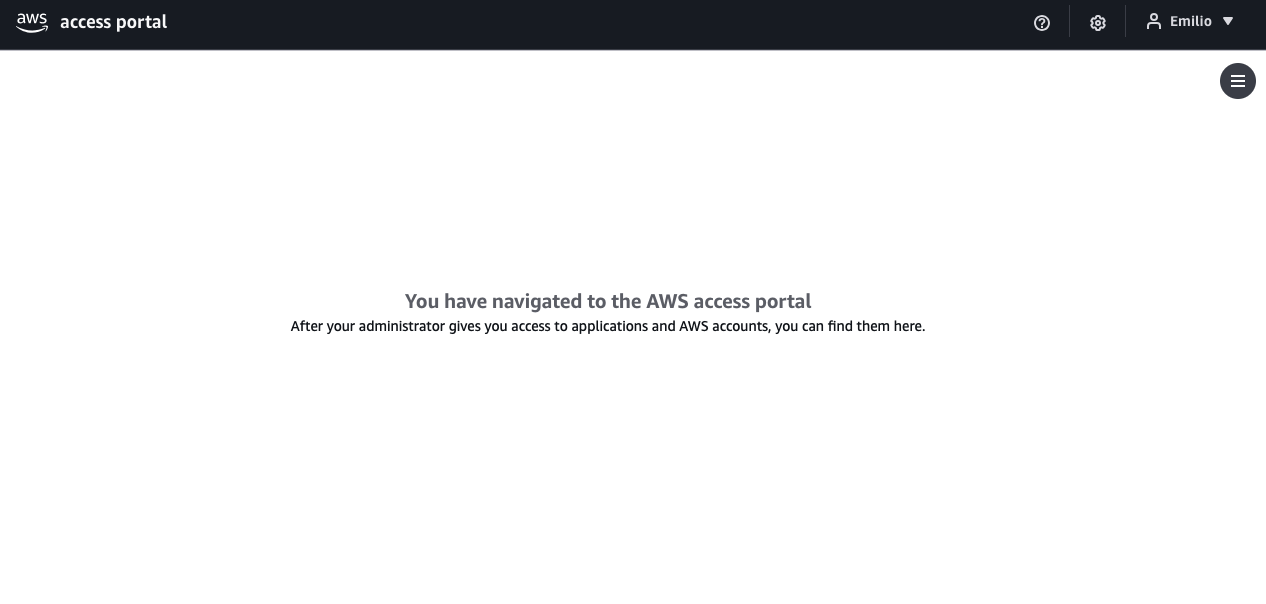
- Once complete, you should be redirected to the AWS access portal. Since we have yet to give our user access, you should see something like in Image 3
Assign access to your user
- Back in the IAM Identity Center console, select AWS accounts from the side panel
- Within your AWS organization, check your account
- Click Assign users or groups
- Under the Groups tab, select the
admingroup created earlier - Click Next
- Select the AdministratorAccess permission set
- Click Next
- Click Submit
This process may take a few minutes to complete
Verifying our access
Management Console
- From the Identity Center Console, click Groups
- Click into the
admingroup - Click the AWS accounts tab
- Here we should see the account that we just assigned our group to. Click your AWS account
- A side panel should open to the right, showing the
Adminstrator Accesspermission set applied in the previous section
Access Portal
Before we assigned access to our admin user, we saw the blank UI from Image 3 , indicating we did not yet have access to the AWS Access Portal. We can verify the application of our permission set by logging into the Access Portal again.
- From the Identity Center console, select Settings
- Under the Identity source tab, open the AWS access portal URL listed and log in using your your admin account credentials if you are not already logged in
- Now you should see your AWS account that you granted the
admingroup and youradminuser access to
By clicking the dropdown, you will see the permission set and access keys listed. Clicking the permission set will take you to the Management Console. Clicking access keys will show you parameters and credentials necessary for configuring access to AWS account resources programmatically or via the AWS CLI. Note the SSO start URL and the SSO Region as these will be used in the following section to configure the AWS CLI.
Setting up the AWS CLI
This guide assumes that you already have the AWS CLI installed on your machine. Steps to the installation guide can be found here: Installing the latest version of the AWS CLI.
Configure the AWS CLI for SSO
From your terminal emulator enter the command:
$ aws configure ssoNote: Within my own AWS Organization, I have a management account, a production account, and a development account. Thus, the profiles and sessions in my AWS CLI setup are named in relation to the production and development account. The values and naming conventions I use in this guide are related to setting up access to the development account in my AWS organization.
You will be prompted for the following:
- SSO session name:
development-session - SSO start URL:
[SSO start URL from the end of the Identity Center section] - SSO region:
[SSO region from the end of the Identity Center section] - SSO registration scopes:
sso:account:access(default)
Your browser should open for you to authenticate using an Identity Center user credentials. It will prompt you to allow botocore-client-v0-session to access your data. Select Allow access.
Once back in the terminal:
- Default client region:
[your SSO region] - CLI default output format:
json(default) - Profile name:
development
Your AWS CLI is officially set up!
Log in to your SSO profile
$ aws sso login --profile developmentUsing your SSO profile
$ aws s3 ls --profile developmentSetting a default profile for a terminal session
If you do not want to continuously add --profile [sso-profile-name] after every aws command, you can set the AWS_PROFILE environment variable using the export command. This way, all aws commands you run after this will assume this profile.
Do not enter $ if copy/pasting commands
$ export AWS_PROFILE=development
$ aws sts get-caller-identity
$ aws s3 ls
Works the same as:
$ aws sts get-caller-identity --profile development
$ aws s3 ls --profile development
Making things even more seamless
You if want to streamline the login process, you can create an alias in your ~/.zshrc or ~/.bashrc to automatically set your AWS_PROFILE and log into your SSO profile.
Append to your ~/.zshrc or ~/.bashrc:
alias dev-sso='export AWS_PROFILE=development && aws sso login --profile development'Source your updates
$ source ~/.zshrcThen test it out
$ dev-ssoGreat job if you made it this far! Using the AWS CLI is essential for automating workflows and processes. If you have any thoughts, feedback, or suggestions I’d love to hear from you. Something not working as expected? UI updates making this guide useless? Send me and email and let me know so that I can update this guide.